How many times do you find yourself reminding your students to look where they are going while riding during a lesson?
Many times we utter a phrase (for the 1000th time….) something along the lines of “Look where you are going!” or “Look forward!”.
It’s likely obvious to us as the instructor where the students should be looking…but is it obvious to the student?
Did you know that this “simple” cue is often not clear or common sense to our students and we need to teach them HOW to “look where they are going”.
Make this common and very important cue more effective by “Landing the look” aka: tell your student exactly where you want them to look while they are trotting down the rail, turning around a corner, halting their horse, etc.
How do we "land the look"?
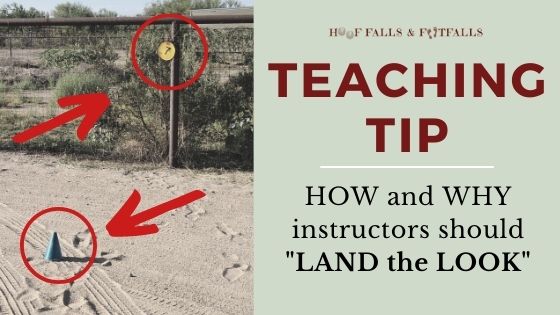
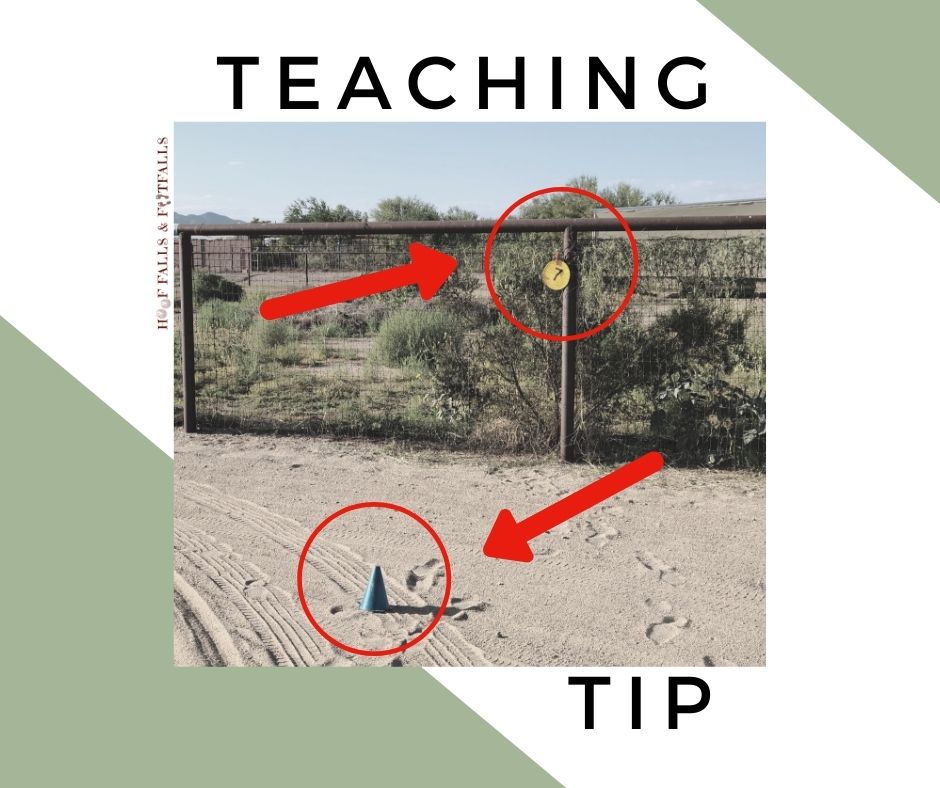
Include the specific spot you want your student to look when you cue them to adjust their line of sight! You know where you want them to look/where they need to look…so tell them!
Example #1:
Instead of saying:
“Look around the corner as you turn”
Swap for something like:
“Look at the purple cone [in the next corner] as you turn through the corner.”
If you need to shorten this cue opt for “Purple cone” instead of “look up” as a quick reminder in the moment.
Example #2:
Instead of saying:
“Don’t forget to look up as you trot down the rail!”
Swap for something like:
“Look at the fence in front of you as you trot down the rail.”
(INSTRUCTOR CHALLENGE: I challenge you to totally remove the phrase “Look up” from your instructing phrases Why? Say it in your head and do exactly what you told yourself to do….not what you meant yourself to do [you should be staring at ceiling]. Yeah…NOT the outcome you wanted from “look up”…was it? 😉. A lot of our students with Autism Spectrum Disorder interpret our cues literally so we need to be aware of our wording.)
Teach your student to “land the look” on their own!
Depending on the student, we may or may not need to
continually “land the look” cue during their lessons.
Some of our students may be able to progress towards more
independence and learn how to identify where they need to look.
So how do we progress our students towards more independence
and where they can “land the look” on their own? Here is a sample progression.
- Step #1 Instructor gives cue that “lands the look” of the student. Example: “Look at the purple cone first before you pull your rein to turn your horse”. At first, the instructor or supporting volunteers may have to use their hand to draw the attention and eyes of the student to the location of the object that is involved in the cue.
- Step #2 Instructor cues student to look where they are going but prompts/checks in to see if student can identify appropriate place to “land the look”.
- Example 1: “As you turn the corner, where should you be looking with your eyes [before you use your rein]?”…..Rider replies with “At the purple cone!”
- Example 2: “Wonderful rhythm while posting. Where should your eyes be looking?”….rider replies with “At the fence in front of me.”
- Step #3 Instructor cues student for line-of-sight adjustment. Instructor sees student “land their look” in the appropriate area. Instructor praises the student landing the look.
- Example “Remember where you look is important during the trot poles”….”Well done keeping your eyes forward and looking at letter C while going over the pole!”
- Step #4 Student independently “lands the look” during different portions of the lesson without cues from the instructor. Instructor recognizes student looking where they should be looking and gives specific praise recognizing this effort/habit. (This should also be done in Steps 1-3 if you catch your student “landing the look” without your prompting!)
- Step #5 Once the student has the concept of looking towards as specific item then we can then teach them to identify a certain area to look at vs. a very specific item. You can encourage them to have a softer, wider “look” by asking them to name two, then three things in the area they should be looking towards:
- Example: instead of looking at just the purple cone in the corner they may identify the top of the arena rail, the tree outside the arena, and the purple cone…all that are in that general “bubble” they should be looking towards.
Common questions about "landing the look":
- What if I don’t have a cone or other items in the arena? Look for some type of landmark….a tree, a chair outside the arena, the mounting ramp, etc. You can also carry a couple different colors of duct tape in your car or teaching bag and pop markers up on the fence (yes…I have multiple colors of duct tape in my car!)
- Does the height of the object I’m having my student look at matter? Yes! If at all possible, have the object they are looking at elevated off the ground (cone on a barrel, tape strip on top fence line, etc.). This will help direct their eyes more forward instead of down and can help with posture. However, if you can’t raise an object up off the ground I would still personally opt for having the object, say a cone, on the ground vs. not having any type of simple visual marker.
Education made for the adaptive/therapeutic riding instructor!
Become a member of The Intuitive Instructor Club! The IIC is an online, on-demand educational platform specifically created for adaptive/therapeutic riding instructors and other EAS industry professionals. Get immediate access to our growing library of 60+ hours of videos (2 new hours of education released every month!)
** I personally chose to use the term Adaptive Riding vs. Therapeutic Riding and avoid ‘horse therapy’ at all costs. Why? CLICK HERE. The thoughts shared in the post above apply to not only Adaptive riding but also to other mounted equine activities and therapies offered at an EAAT (Equine Assisted Activity and Therapy) Program/Center/Barn.