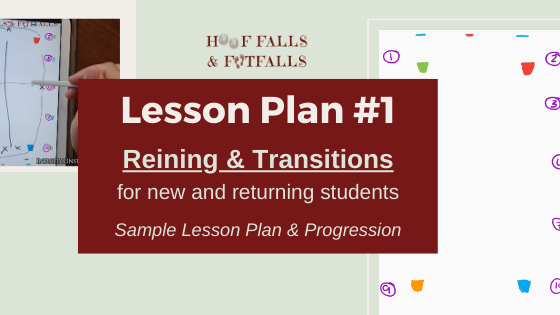
Lesson Plan #1: Reining & Transitions
Horsemanship Objectives:
- Demonstrate appropriate approach and haltering of horse
- Demonstrate appropriate leading of horse with halter and lead rope
- Identify names and appropriate uses of grooming tools
- Name 3 horse parts
- Name 2 headstall parts
- Name 3 saddle parts
- Tack up horse with assistance
Riding Objectives:
- Demonstrate a safe pre-mount equipment prep and check
- Demonstrate safe mount
- Name and demonstrate natural aids
- Demonstrate correct riding posture and alignment at the halt and walk
- Maintain posture and alignment during walk-halt-walk transitions
- Demonstrate use of natural aids for walk-halt-walk transitions
- Demonstrate appropriate rein acquisition and holding
- Demonstrate correct use of open and direct rein through turns in the corners
- Demonstrate use of natural aids to maintain straight lines on the rail
- Name and locate centerline and midline
- Demonstrate change of rein through the midline and centerline
- Demonstrate safe dismount
- Demonstrate safe post-dismount equipment adjustment
Arena Setup & Props:
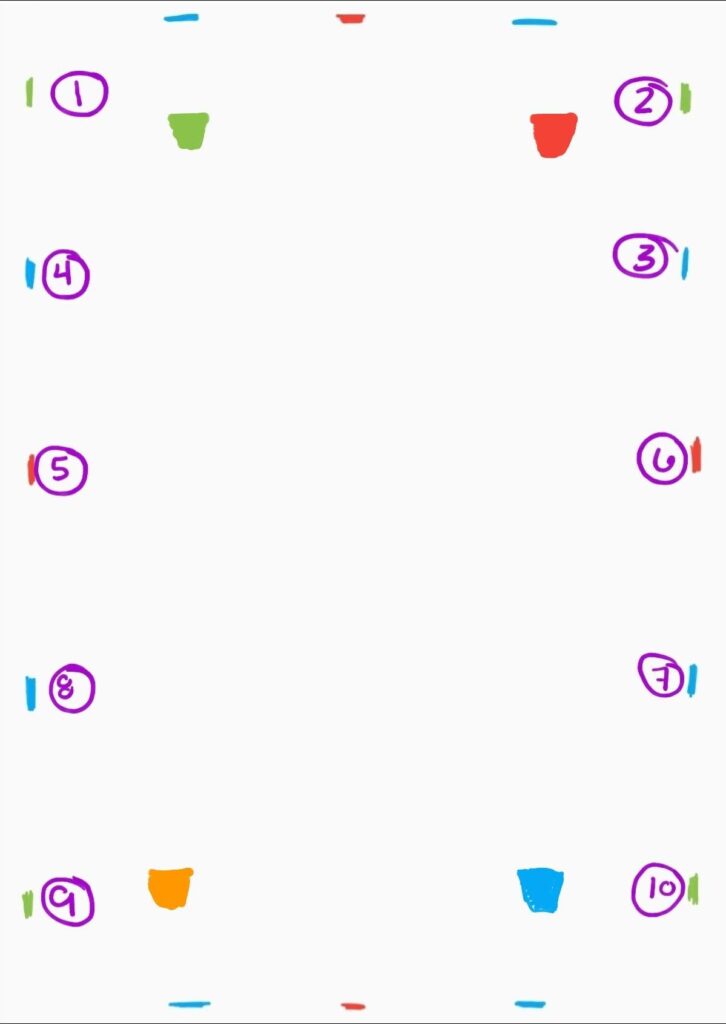
- Rubber number circles 1-8 (and clothespins to attach to railing or props)
- 4 different colored cones
- Time Fillers/Attention Keepers- colored rings matching cones (1-2 for each cone). Buckets and bean bags can also be used in lieu of cones and rings.
- CLICK HERE to view blog describing the GAME utilized in this lesson
Lesson Flow/Progression
-
30 minute lesson- Riding portion only
-
60 minute lesson- Groundwork & riding portions
Groundwork portion of lesson (20-25 min)
- Approach & Halter
- Taking halter off stall railing and holding in hand to prepare for approach.
- How to approach and halter horse in stall
- Leading & tying
- How to lead out from stall to tacking area
- How to tie horse- safety knot or crossties
- Grooming
- Introduce name, use, and purpose of grooming tools
- Tacking
- For each piece of tack: cover name, use, and how to put on horse
- Emphasize 3 step girthing process
- Gentle snug while in grooming area, finger tight before pre-mount walk, riding tight before mount
- Set stirrups- rough estimate based on rider height
- Introduce dressing/running up and down irons
- Introduce how to guestimate stirrup length
Riding portion of lesson (30 min)
- https://hooffallsandfootfalls.com/game-idea-ring-or-bean-bag-toss/Leading before mount
- How to lead horse for warmup lap
- Walk through arena pattern on ground- with instructor assistance as needed and for time reasons.
- Adjust down: play follow the leader
- Adjust up: increase independence
- Pre-mount equipment check
- Reins over horse’s head, stirrups run down, girth check
- Adjust down- student copies what instructor does and/or points to parts as instructor names them during check.
- Adjust up- student reviews or demonstrates pieces
- Reins over horse’s head, stirrups run down, girth check
- Load horse in mounting area
- Adjust down: Student calls horse in to mounting area
- Adjust Up: Review how student can load horse in mounting area
- Introduce mounting
- How to hold reins while mounting and why it’s important
- Good body mechanics while mounting- as appropriate to rider and with appropriate assistance
- Importance of horse standing for at least a 3 count before walking off
- Walk away from mounting area for tack check
- Girth check
- Verbalize & explain so student learns timing and whys
- Set stirrups
- Adjust up: Review how student can independently adjust
- Warmup/ Skill Review:
- Proper sitting position on horse at halt and walk
- “Neutral hand position” for walking
- How to stop using voice, body, and reins
- Adjust down: voice or hand signal for halt
- Adjust up: reinforcement of voice and body first before reins
- How to ask for walk using voice and body.
- Adjust down: voice or tap on horse’s neck for walk
- Adjust up: reinforcement of body and voice first before harsh legs
- For more nervous or newer students this may be done before introducing reins:
- Deep breaths (from stomach not chest)- 3 deep breaths before walking on
- One arm airplanes- hold for 5 seconds on each side, repeat 2x each side
- Adjust Down- If rider is uncertain have them try at a halt first before walking. Utilize sidewalkers and have students point and touch volunteer’s hands as target for airplane arm.
- Two arm airplane- hold for 5 seconds and repeat 2x each direction
- Adjust down- If rider is uncertain have first rep be at a halt before executing at a walk. Utilize sidewalkers and have them raise hands as targets for airplane arms.
- Skill Practice & Application
- Walk on rail 1 lap each direction using cones as reinforcement for going deep into corners- change rein through midline (introduce term)
- Focusing on proper body mechanics and use of natural aids during straight lines and turns
- Adjust up: review use of leg and rein aids for bending and straightening
- Adjust down:
- Have students “low five” around turns as appropriate to reinforce which hand to move for a turn. Use sidewalker’s hand as target for low five.
- When they would be using rein to turn, have students point with turning hand towards corner cone and identify color.
- Focusing on proper body mechanics and use of natural aids during straight lines and turns
- Walk on rail 1 lap each direction using cones as reinforcement for going deep into corners.
- Halt at each cone- focus on proper body mechanics and use of natural aids during walk-halt-walk transition
- Adapt down: For students with shorter attention spans incorporate transitions by cones and have them toss rings onto the cones in the corners. Reinforce setting down and picking up reins, posture and alignment, and natural aids during transitions at cones.
- Adjust up: Add more challenge by naming a specific part of the horse that must be stopped by the cones (nose, barrel, hindquarters, etc)
- Halt at each cone- focus on proper body mechanics and use of natural aids during walk-halt-walk transition
- Walk on rail 1 lap each direction using cones as reinforcement for going deep into corners- change rein through midline (introduce term)
- Extra Skill Practice & Application (for students progressing quickly and/or returning students)
- Introduce/review 2-point at halt then at walk- on lead or lunge line
- Adjust up- Airplane arm 2-point, shortening/lengthening reins in 2-point (for returning walk, walk/trot students)
- Review posting at walk on lunge line with hands on hips or thighs (for prior walk/trot students)
- Review posting at trot on lunge line with hands on hips or thighs (for prior walk/trot students)
- Introduce/review 2-point at halt then at walk- on lead or lunge line
- Cool down/review
- What was their favorite part of the lesson?
- What was the most challenging thing they did during the lesson?
- What was the easiest thing they did during the lesson?
- What will they remember to work on during next lesson?
- Adapt up: Quickly review serpentine by following number circles (for returning students)
- What was their favorite part of the lesson?
- Dismount
- Where do reins go when dismounting?
- Where does dismount side stirrup go when dismounting?
- Good body mechanics when dismounting
- Review shortening reins while in 2point
- Where do reins go when dismounting?
- Post-dismount & Lead out
- Run up/dress irons
- Loosen girth
- Reins up and over
- Lead horse out.
Groundwork portion of lesson (5-10 min)
- Quick team untack with instructor due to time limitation.
- Adjust up- verbal support from instructor to review process with student (for returning students)
Lesson plan notes:
- Instructor Involvement: All skills should be taught with appropriate involvement of the instructor to maintain safety but also promote growth and independence. Instructor should constantly adjust verbal and physical support and cueing and teaching methods depending on the needs of the student(s).
- Appropriate Support: All skills should be taught with appropriate support such as on/off lead, on a lunge line, with a horse leader, 1-2 sidewalkers, etc. and reflect the skill level, physical ability, and cognitive ability of the student during that day’s lesson.
- Depth of Skill & Time Management: The depth to witch the skill is taught should reflect experience of the student and mindfulness of the time available for that activity. As skills and activities are repeated from lesson to lesson (e.g.: grooming, tacking, mounting, etc.), more depth can be added to the skill to promote growth and independence of the student.
- General Groundwork and Riding Objectives listed will likely be repeated for several lessons until student demonstrates competency. Each lesson will include more whats/hows/whys for each skill given in the objective to match the ability and skill level of the student. Objectives listed are to help instructor stay on track and remember the different components that can be practiced and reinforced during this and future lessons for new and returning students.
- Custom measurable objectives can be written for each student depending on the main objective you will be focusing on and their skill and ability level. (e.g.: Student will demonstrate appropriate rein use during steering and walk-halt-walk 50% of attempts without physical prompts).
- Adjust Down= Adjustment for students with shorter attention spans, shorter physical stamina, have volunteer teams, progress more slowly, etc. Options given in lesson plan are not the only way to “adjust down” but are examples and common adjustments. Lesson components should always be adjusted and adapted to meet the need of the student(s) you are teaching.
- Adjust Up= Adjustment for students who progress quickly, pick up on main skill fast, need more challenge, etc. Options given in lesson plan are not the only way to “adjust up” but are examples and common adjustments. Lesson components should always be adjusted and adapted to meet the need of the student(s) you are teaching.
Watch the Replay of Live Talk about Lesson Plan #1
** I personally chose to use the term Adaptive Riding vs. Therapeutic Riding and avoid ‘horse therapy’ at all costs. Why? CLICK HERE. The thoughts shared in the post above apply to not only Adaptive riding but also to other mounted equine activities and therapies offered at an EAAT (Equine Assisted Activity and Therapy) Program/Center/Barn.
This page contains Amazon Affiliate Links. I earn a small commission off any products purchased through my affiliate links. This commission goes right back into HF&F to help offset the time, money, and resources it takes to creating free and low-cost EAS Industry Instructor education! Thank you for your purchases though my links!